coats tire changer manual
This manual provides comprehensive guidance for the Coats Tire Changer, covering setup, operation, and maintenance. It ensures safe and effective use of the equipment for professionals and DIYers alike.
1.1 Overview of the Coats Tire Changer
The Coats Tire Changer is a high-quality, durable tool designed for efficient tire demounting and mounting. Available in various models like the 7050 and 4050A, it features advanced technologies such as pneumatic wheel clamping and leverless operation. Built for both professionals and DIYers, it ensures safe and precise handling of automotive and light truck tires. The machine is designed with a user-friendly interface and robust construction, making it a reliable choice for workshops and home garages. Its compatibility with a wide range of tire sizes and types ensures versatility for diverse applications.
1.2 Importance of the Manual
The Coats Tire Changer Manual is essential for safe and effective operation. It provides detailed instructions for installation, maintenance, and troubleshooting, ensuring optimal performance. The manual includes safety precautions, parts identification, and operating guidelines, helping users avoid potential risks. By following the manual, users can maximize the equipment’s lifespan and efficiency. It serves as a critical resource for both professionals and DIYers, offering clear guidance to handle various tire changing tasks confidently and correctly. Adhering to the manual’s instructions is crucial for achieving professional-grade results and maintaining equipment reliability.
1.3 Target Audience
This manual is designed for professionals, DIY enthusiasts, and automotive businesses. It caters to users of Coats Tire Changers, including mechanics, tire shop employees, and vehicle owners. The guide is essential for anyone needing to install, operate, or maintain the equipment. Whether for routine tire changes or complex wheel assemblies, this manual provides clear instructions. It is particularly useful for those familiar with basic automotive tools and procedures, ensuring safe and efficient use of the Coats Tire Changer across various applications and models.

Safety Precautions and Warnings
Adhere to all safety guidelines to prevent accidents. Wear protective gear, ensure proper equipment setup, and follow operating instructions carefully to avoid injuries and machine damage.
2.1 General Safety Guidelines
Always read and understand the entire manual before operating the Coats Tire Changer. Ensure proper installation and setup, following all safety instructions. Wear protective gear, including gloves and safety glasses, when using the machine. Keep loose clothing and long hair tied back to avoid entanglement. Ensure the tire changer is securely bolted to the floor and all moving parts are clear of obstructions. Never exceed the recommended load capacity or operate the machine in reverse. Regularly inspect the equipment for wear and tear, and address any issues promptly to maintain safe working conditions. Failure to follow these guidelines can result in injury or equipment damage.
2.2 Emergency Procedures
In case of an emergency, immediately disconnect the power supply and stop all operations. For sudden machine malfunction, activate the emergency stop button. If a tire explodes during inflation, evacuate the area and wear protective gear. Never attempt to repair the machine while it is operational. Keep a fire extinguisher nearby and ensure clear access to emergency exits. Regularly inspect hoses, valves, and connections to prevent sudden failures. Always follow the manual’s guidelines for handling unexpected situations to ensure safety and minimize damage.
2.3 Safety Features of the Coats Tire Changer
The Coats Tire Changer is equipped with multiple safety features to ensure safe operation. Key components include an emergency stop button, protective guards, and fail-safe mechanisms to prevent accidents. The pneumatic wheel clamping system securely holds wheels in place, reducing the risk of tire explosion. Additional features like automatic shut-off and pressure relief valves further enhance safety. Regular maintenance, as outlined in the manual, is crucial to maintaining these safety mechanisms. Always follow the manufacturer’s guidelines to ensure optimal performance and operator protection.
Installation Instructions
Proper installation is crucial for safe operation. Secure the unit to a stable surface using provided bolts, ensure power supply compatibility, and follow manual guidelines for setup.
3.1 Choosing the Right Location
Choose a stable, level surface for the Coats Tire Changer, ensuring adequate space for operation. The area should be well-ventilated, away from hazards, and near a power source. Ensure the floor is sturdy to support the machine’s weight. Proper placement enhances safety and efficiency, preventing vibrations and instability. Secure the unit to the floor using provided bolts to avoid movement during use. Check that the location allows easy access for maintenance and operation. Refer to the manual for specific spacing recommendations to ensure optimal performance and compliance with safety standards.
3.2 Securing the Tire Changer
Properly secure the Coats Tire Changer to a sturdy, level surface using the provided floor bolts. Ensure the area is flat and even to prevent instability. Tighten all bolts firmly, following the torque specifications in the manual. Verify that the machine is level and stable before use. If installed on a concrete floor, ensure anchors are deeply embedded for maximum stability. Consult the manual for specific hardware recommendations. Improper securing can lead to machine vibration or damage during operation, so double-check all connections for safety and performance.
3.3 Connecting to Power Sources
Connect the Coats Tire Changer to a suitable power source as specified in the manual. Ensure the power cord is undamaged and rated for the machine’s voltage requirements. For models requiring compressed air, connect to a clean, dry air supply. Avoid overloading circuits and use a dedicated outlet. Verify the power source matches the machine’s specifications before operation. Always follow safety guidelines when handling electrical connections. Refer to the manual for detailed instructions on wiring and air supply setup to ensure proper functionality and safety. Proper connection is critical for optimal performance and longevity of the tire changer.

Maintenance and Upkeep
Regular maintenance ensures optimal performance and longevity of the Coats Tire Changer. Perform routine checks, lubricate moving parts, and address issues promptly to prevent machine downtime.
4.1 Lubrication Requirements
Proper lubrication is essential for maintaining the Coats Tire Changer’s performance. Apply high-quality grease to moving parts and gears regularly, ensuring smooth operation. Refer to the manual for specific lubrication points and intervals. Always use the recommended types of lubricants to avoid damage. Clean old grease before reapplication to prevent contamination. Regular lubrication prevents wear and tear, extending the machine’s lifespan and ensuring efficient tire changing operations. Follow the manufacturer’s guidelines for optimal maintenance.
4.2 Regular Maintenance Checks
Regular maintenance checks are crucial for ensuring the Coats Tire Changer operates efficiently. Inspect all moving parts for wear and tear, and replace worn components promptly; Check the pneumatic wheel clamping system for proper function and leak-free operation. Lubricate all specified points as outlined in the manual. Examine hoses and connections for damage or leaks. Ensure the hydraulic system is functioning correctly and free from contamination. Perform these checks at intervals recommended by the manufacturer to maintain optimal performance and prevent unexpected downtime. A well-maintained machine ensures safety and reliability in tire changing operations.
4.3 Troubleshooting Common Maintenance Issues
Common maintenance issues with the Coats Tire Changer include problems with bead seating, tire leaks, and machine malfunctions. Check for proper lubrication of moving parts and ensure the pneumatic clamping system is functioning correctly. If the tire does not seat properly, inspect for debris or damage to the bead seat area. Address any leaks by tightening connections or replacing worn seals. Refer to the manual for specific troubleshooting steps and solutions. Regular checks can help prevent these issues and ensure smooth operation. Always follow the manufacturer’s guidelines for repairs and maintenance.

Operating Instructions
Prepare the tire changer by ensuring all parts are lubricated and functioning properly. Clamp the wheel securely, inflate the tire slowly, and monitor pressure closely. Always follow safety guidelines and manufacturer instructions for optimal performance and safety.
5;1 Preparing the Tire Changer
Before operation, ensure the Coats Tire Changer is properly prepared. Lubricate all moving parts, inspect the clamping system for damage, and check the inflation hose for leaks. Verify that the power source is stable and the machine is securely bolted to the floor. Familiarize yourself with the controls and safety features. Always refer to the manual for specific preparation steps tailored to your model. Proper preparation ensures efficient, safe, and damage-free tire changing operations.
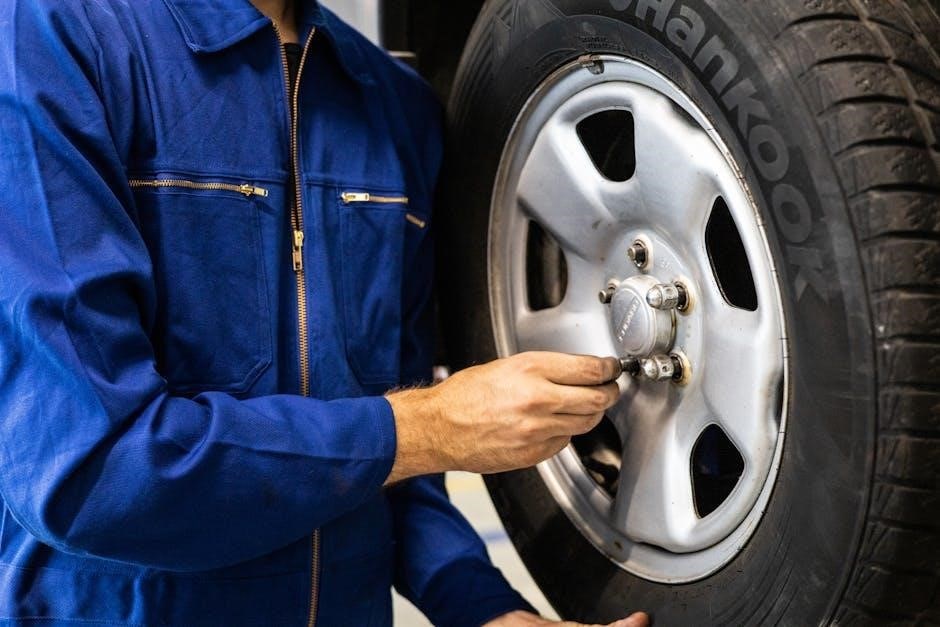
5.2 Demounting Tires
Begin by loosening the wheel’s lug nuts with a wrench before raising the vehicle. Secure the wheel on the Coats Tire Changer using the clamping system. Activate the bead breaker to release the tire from the rim. For tubeless tires, ensure the bead is broken on both sides. Use the tire iron to carefully pry the tire away from the rim, working around the wheel until it is completely removed. Always apply lubrication to prevent damage during demounting. Follow the manual’s specific instructions for your model to ensure safe and efficient tire removal.
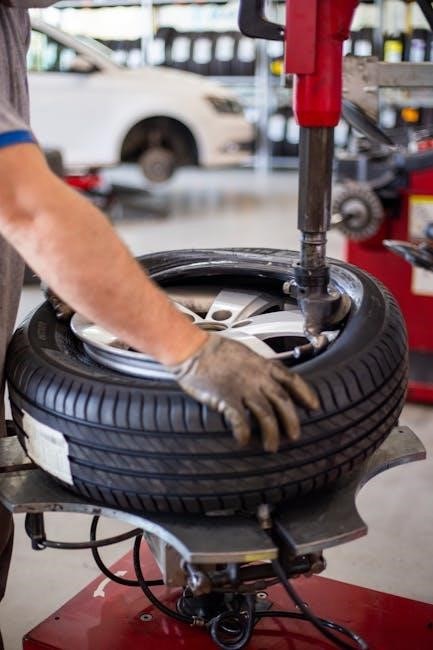
5.3 Mounting Tires
Position the tire on the rim, ensuring proper alignment. Apply lubrication to the bead and rim to prevent damage. Use the Coats Tire Changer’s clamping system to secure the wheel. Inflate the tire slightly to seat the bead, then deflate and re-lubricate. Re-inflate to the recommended pressure while checking for proper bead seating. Ensure the tire is centered and balanced before releasing the clamp. Refer to the manual for specific instructions tailored to your Coats model to guarantee a secure and precise mounting process.
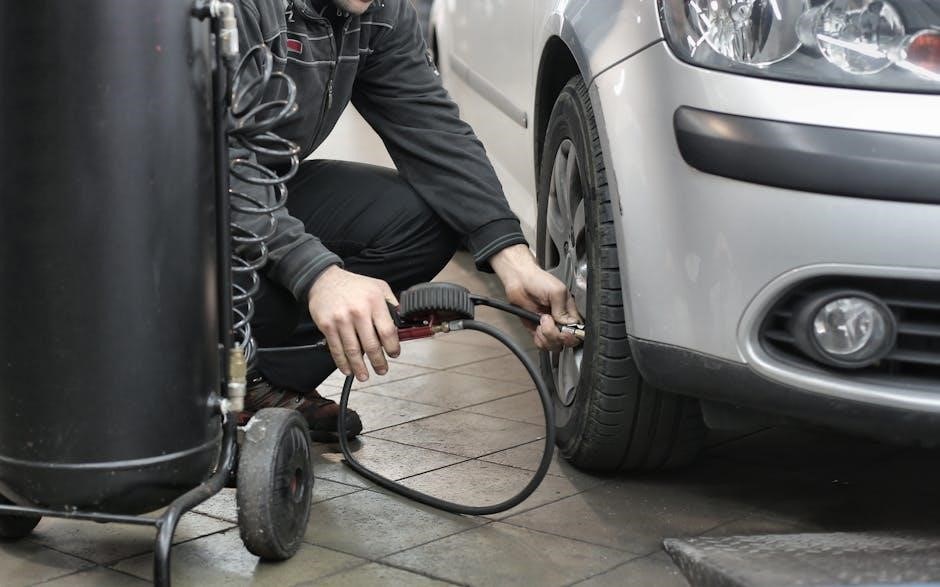
5.4 Inflating Tires
Attach the inflation hose to the valve stem and ensure it is securely connected. Inflate the tire to the recommended pressure, monitoring the gauge closely. Once inflated, inspect the tire to confirm the bead is properly seated and the valve stem is clear of obstructions. Use the Coats Tire Changer’s built-in pressure gauge for accuracy. After inflation, double-check the tire pressure with a separate gauge to ensure it matches the vehicle’s specifications. Always follow the manual’s guidelines for safe and precise inflation procedures.
Advanced Features of the Coats Tire Changer
The Coats Tire Changer boasts advanced features like a pneumatic wheel clamping system and leverless operation, enhancing efficiency and safety during tire demounting and mounting processes.
6.1 Pneumatic Wheel Clamping System
The pneumatic wheel clamping system offers faster and more efficient tire changing by providing a secure grip on the wheel. This feature minimizes the risk of wheel damage and ensures stability during operations. It is powered by compressed air, eliminating the need for manual clamping, thus reducing effort and time. The system is designed for durability and reliability, making it a key component in the Coats Tire Changer’s advanced functionality. Proper maintenance, as outlined in the manual, ensures optimal performance of this system.
6.2 Leverless Operation
The leverless operation feature of the Coats Tire Changer enhances efficiency and ease of use. This advanced system eliminates the need for manual levers, reducing operator fatigue and speeding up the tire-changing process. By utilizing pneumatic or hydraulic mechanisms, the machine automatically secures and releases the tire, ensuring precise control and minimizing the risk of wheel damage. This feature is particularly beneficial for high-volume environments, as it streamlines workflows and improves overall productivity. The leverless design also contributes to a safer operating experience by reducing the physical strain on the user.
6.3 Other Advanced Features
The Coats Tire Changer includes additional advanced features that enhance performance and user experience. These include a pneumatic wheel clamping system for secure and damage-free tire handling, an advanced inflation system for precise pressure control, and a touchpad control panel for intuitive operation. The machine also features a self-centering mechanism, ensuring accurate wheel positioning, and an ergonomic design to reduce operator fatigue. These innovations make the Coats Tire Changer a versatile and efficient tool for both professional and DIY use, streamlining the tire-changing process while maintaining high standards of safety and reliability.
Troubleshooting Common Issues
This section helps identify and resolve common problems, such as bead seat issues or machine malfunctions, by referencing error codes and providing step-by-step solutions for optimal functionality.
7.1 Bead Seal and Bead Seat Problems
Bead seal and bead seat issues are common and can prevent proper tire inflation. Ensure the tire beads are clean and free from debris; Apply the recommended lubricant to the beads and rim. If the beads do not seat properly, check for rim damage or uneven surfaces. Relubricate and retry the seating process. If issues persist, inspect the tire changer’s clamping system for alignment or damage. Refer to the troubleshooting guide for detailed steps to resolve these problems effectively and ensure a secure seal for safe operation.
7.2 Tire Leaks and Inflation Issues
Tire leaks and inflation problems often stem from improper bead seating or valve stem damage. Ensure the tire is properly lubricated and seated using the Coats Tire Changer’s clamping system. Check the valve stem for blockages or damage and ensure it is tightly secured. Inflate the tire to the recommended pressure and inspect for leaks around the bead and valve areas. If issues persist, refer to the manual for specific troubleshooting steps to resolve the problem effectively and maintain proper tire function.
7.3 Machine Malfunction and Error Codes
Machine malfunctions and error codes on the Coats Tire Changer often indicate issues like improper setup or component wear. Check the control panel for specific error codes, which guide troubleshooting. Common issues include faulty sensors, insufficient lubrication, or blocked air filters. Refer to the manual’s error code chart for diagnoses. For example, codes related to pneumatic systems may signal low air pressure. Regular maintenance, such as cleaning filters and lubricating moving parts, can prevent malfunctions. If problems persist, consult the troubleshooting section or contact Coats support for assistance.
Parts Identification and Replacement
Identifying and replacing parts on the Coats Tire Changer ensures optimal performance and safety. Use the manual’s exploded views and parts list to locate and order components.
8.1 Major Components of the Coats Tire Changer
Understanding the major components of the Coats Tire Changer is essential for effective operation and maintenance. Key components include the pneumatic wheel clamping system, which securely holds the wheel during tire changes; The leverless operation mechanism simplifies the process, reducing manual effort. The control panel houses essential controls for inflation and clamping functions. Additional components such as the base assembly, vertical swing-arm, and filter-lubricator ensure smooth and reliable performance. Familiarizing yourself with these parts enhances troubleshooting and maintenance efficiency, as detailed in the manual.
8.2 Ordering Replacement Parts
Ordering replacement parts for your Coats Tire Changer is straightforward when using the detailed parts breakdown provided in the manual. Ensure to reference the correct part numbers from the exploded view illustrations. Contact authorized Coats distributors or visit their official website for genuine components. Use the order form or online portal to specify required items, ensuring compatibility with your model. Always verify part availability and lead times before placing orders. For assistance, consult the customer support team or refer to the manual’s contact information section.
8.3 DIY Replacement Tips
For DIY replacements, always refer to the manual’s parts list and exploded view diagrams to identify components accurately. Start by gathering tools and genuine Coats parts to ensure compatibility. Follow step-by-step instructions carefully, and use torque specifications to avoid damage. Lubricate moving parts post-replacement and test functionality. If unsure, consult customer support or a professional technician. Regularly check for wear and tear to prevent premature part failure. Keep a maintenance log to track replacements and ensure optimal performance of your Coats Tire Changer.

Frequently Asked Questions (FAQ)
- Q: What models are covered in this manual? A: It covers Coats 4050A, 7050, 7665, and other specified models.
- Q: How do I troubleshoot bead seat issues? A: Refer to Section 7.1 for detailed troubleshooting steps.
- Q: Where can I find replacement parts? A: Visit www.coatsgarage.com or contact Hennessy Industries for genuine parts.
- Q: What safety precautions should I follow? A: Always refer to Section 2 for safety guidelines before operating.
9.1 General Usage Questions
- Q: Which tire models are compatible with the Coats Tire Changer?
A: It supports most automotive and light truck tires, including tubeless and radial designs.
- Q: Can the Coats Tire Changer operate without electricity?
A: Yes, certain models like the Rim Clamp series are entirely air-powered.
- Q: What is the maximum tire size it can handle?
A: It varies by model, but most handle up to 24-inch wheels.
- Q: How do I ensure optimal performance?
A: Follow the manual’s lubrication and maintenance guidelines.
Always refer to the manual for specific usage instructions.
9.2 Technical and Maintenance Questions
- Q: What lubrication is recommended for the Coats Tire Changer?
A: Use high-quality, water-resistant grease for all moving parts to ensure smooth operation.
- Q: How often should I perform maintenance checks?
A: Regular checks every 50 hours of use are advised to maintain performance and safety.
- Q: How do I troubleshoot common issues like bead seat problems?
A: Relubricate tire beads and ensure proper alignment before reattempting the procedure.
- Q: Where can I find replacement parts?
A: Refer to the parts identification section or contact Hennessy Industries for genuine components.
Proper maintenance ensures longevity and optimal functionality of the Coats Tire Changer.
9.3 Warranty and Support Information
Your Coats Tire Changer is backed by a limited warranty covering defects in materials and workmanship. For specific terms, refer to the warranty section in this manual. Technical support is available through Hennessy Industries at www.coatsgarage.com or by calling 800/688-6359. Contact their support team for troubleshooting, maintenance advice, or to order genuine replacement parts. Additionally, online resources and FAQs are available to address common questions and ensure optimal performance of your tire changer.
This manual ensures optimal use of your Coats Tire Changer. Adhere to guidelines for safety and efficiency, and contact support for any assistance or inquiries.
10.1 Final Tips for Optimal Use
For optimal performance of your Coats Tire Changer, always follow the manual’s guidelines. Regularly lubricate moving parts and inspect for wear. Use the correct techniques for demounting and mounting tires to avoid damage. Ensure proper inflation pressures and check bead seating. Maintain a clean workspace to prevent accidents. Refer to the troubleshooting section for common issues and solutions. By adhering to these tips, you’ll extend the life of your equipment and ensure safe, efficient operations.
10.2 Importance of Following the Manual
Adhering to the Coats Tire Changer manual is crucial for safety and optimal performance. It ensures proper techniques are used, reducing the risk of accidents and equipment damage. Following the manual also guarantees compliance with manufacturer guidelines, preserving warranty terms. Neglecting the instructions can lead to improper tire handling, potentially causing machine malfunction or personal injury. By adhering to the manual, users can maximize the lifespan of their tire changer and ensure efficient, reliable operation. Consistent compliance with the manual is essential for maintaining both equipment integrity and user safety.
10.3 Contact Information for Support
For assistance with your Coats Tire Changer, contact Hennessy Industries Inc. at 1601 J. P. Hennessy Drive, LaVergne, TN 37086. Call toll-free at 800/688-6359 or 615/641-7533. Visit their website at www.coatsgarage.com for support resources, including manuals and FAQs. Email inquiries can be directed to their customer service team. Ensure to reach out for troubleshooting, maintenance, or parts replacement. This support ensures optimal performance and longevity of your Coats Tire Changer.
Related Posts

ti 89 graphing calculator manual
Lost your TI-89 manual? Find a clear, easy-to-understand guide right here! Master graphing, functions, and more with our helpful resources. **TI-89 Manual** made simple.

2018 chevy equinox owners manual
Lost your 2018 Chevy Equinox owner’s manual? No sweat! Find everything you need right here – from maintenance to features. Drive with confidence! 2018 Chevy Equinox.

fisher paykel manual refrigerator
Lost your Fisher & Paykel fridge manual? 3-DTapestry has a huge collection of free downloadable manuals! Get help with troubleshooting, features & more. **Refrigerator Manual** made easy.